
High greenhouse humidity at night usually comes from three conditions acting together: water vapor is still entering the air, the air and greenhouse surfaces are cooling, and local airflow is too weak to keep conditions uniform. The first control step is to identify the event sequence and compare the local dew point with the relevant cold surfaces. A single room RH reading is not enough.
Key takeaways
- Nighttime moisture input may continue and must be measured for the specific crop and condition.
- The first local cold surface can become critical before a room sensor shows the full risk.
- Use time-matched air dew point, surface temperature, control state, and event data.
- Ventilation effectiveness depends on outdoor moisture conditions and operating constraints.
- Evaluate mechanical dehumidification only for the verified duty that remains.
Why humidity rises so quickly after sunset
Relative humidity rises as air cools, even when the amount of water vapor in the air has not increased. At the same time, the greenhouse may continue to receive moisture from plants, growing media, wet floors, irrigation, or uncontrolled air exchange.
Night load should therefore not be assumed to be zero. Research on greenhouse night transpiration measured continuing vapor input under the studied crop and greenhouse conditions, while also showing that the amount depends on the crop and operating context (Seginer et al.). The correct conclusion is not a universal night-load factor. It is that each project should verify what continues to add moisture after sunset.
The typical sequence is:
- Solar input falls and the greenhouse air begins to cool.
- Leaves, glazing, frames, and other exposed surfaces cool at different rates.
- The same water-vapor content produces a higher RH as air temperature falls.
- Plant and surface moisture may continue entering the air.
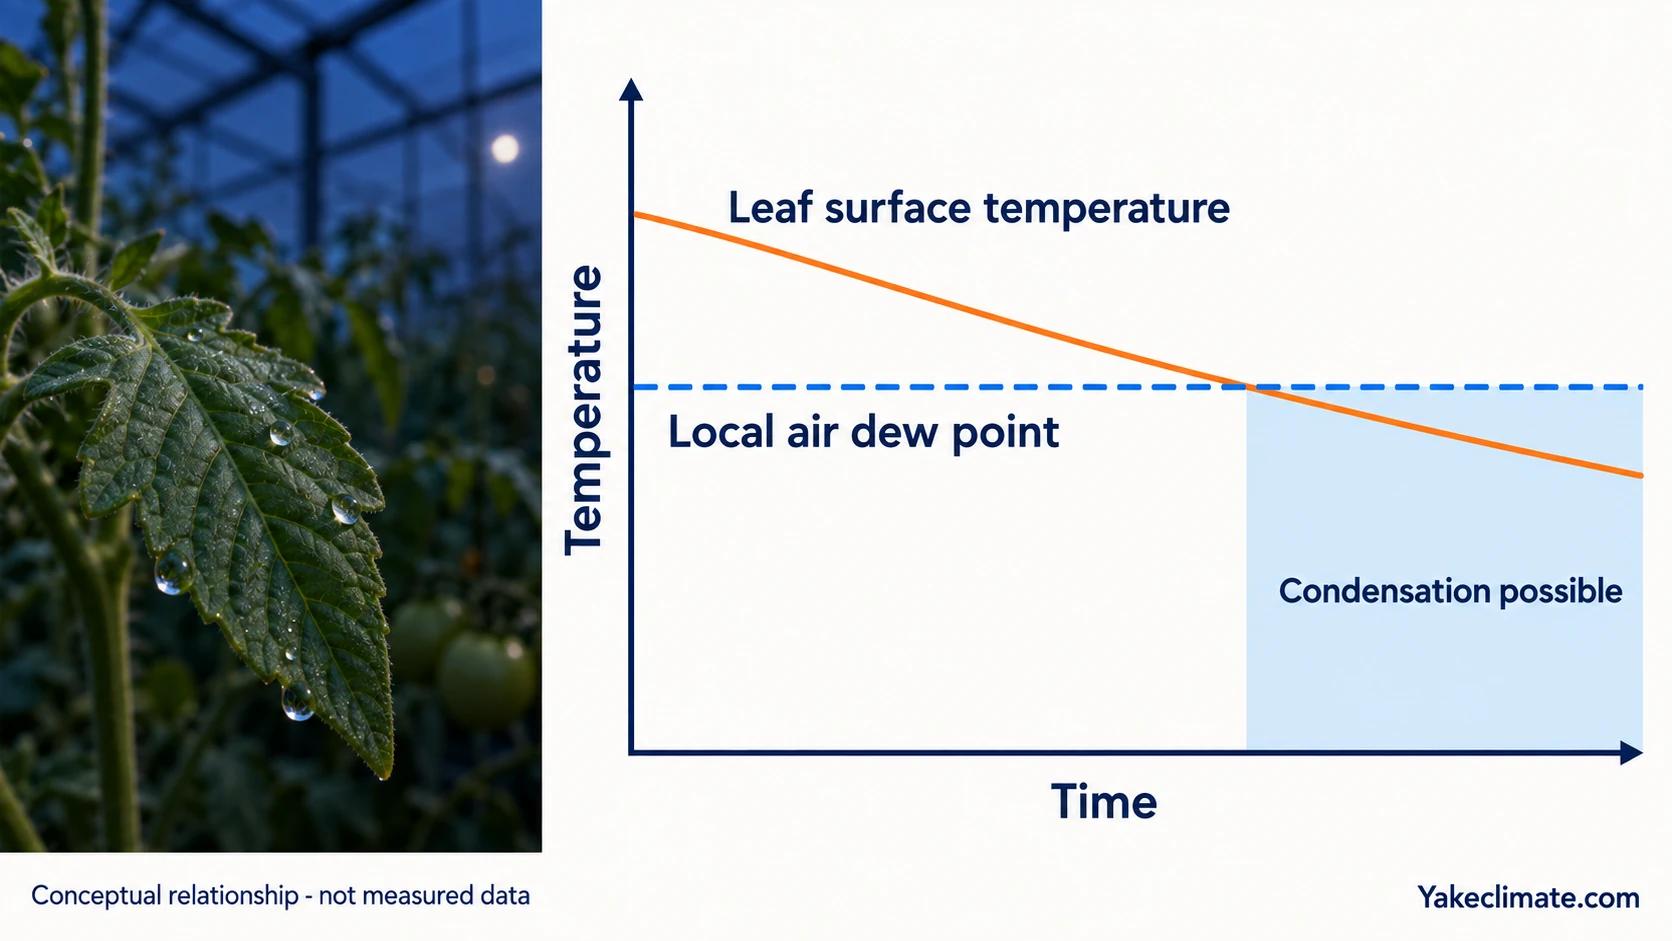
- If a local surface falls below the dew point of the air touching it, condensation becomes possible.
- Stagnant air allows local zones to diverge from the main room sensor.
This is why the most useful night data is a timeline, not a daily average.
Find the first cold surface
Room air is not the only condition that matters. Condensation risk begins at a surface.
University of California Agriculture and Natural Resources explains that leaves, flowers, buds, and greenhouse structures can become the coolest surfaces as they radiate heat toward the night sky. Its guidance also notes the role of canopy air movement in reducing local condensation risk (UC ANR).
Inspect the greenhouse for surfaces and zones that cool faster than the occupied air:
- upper leaves or flowers with exposure to the roof or night sky;
- glazing, frames, purlins, pipes, and structural joints;
- perimeter zones and areas near leakage paths;
- dense canopy zones with weak circulation;
- surfaces near uninsulated boundaries or cold-water lines;
- areas downstream of cool supply air.
Record where visible water first appears and when it appears. That observation can be more diagnostic than a later room-average reading.
Compare local dew point and surface temperature
Condensation becomes possible when a surface is colder than the dew point of the air in contact with it. The comparison must be local and time-matched.
Use the following measurement set during the problem period:
| Measurement | Preferred location | Purpose |
| Air temperature and humidity | Near the affected canopy or surface, without direct wetting | Establish the local air condition and dew point |
| Surface temperature | On or representative of the suspected cold surface | Test whether the surface is approaching the local dew point |
| Main room temperature and humidity | Existing control location | Compare the control signal with the risk zone |
| Control state | Vent, heater, fan, screen, and dehumidifier commands | Connect environmental change to system action |
| Event log | Sunset, irrigation, door opening, weather change, visible condensation | Build the sequence that led to the event |
Do not turn this into a universal control margin. Sensor position, response time, calibration, surface selection, and project consequences all affect how the system designer sets alarms and control conditions.
Read morning RH and surface risk separately
Morning warming can change the air reading without proving what the plant surface is experiencing. With water vapor unchanged, warmer air tends to show lower RH; therefore a morning RH rise cannot be explained by warming alone (UMass Extension). Look for another coincident change in moisture or measurement context rather than treating the trend as a cause.
During warm-up, plants may lag behind surrounding air. Cold air can remain within the canopy, leaving plant temperature below the local dew point while air above warms (AHDB). Thus air warming and falling RH do not by themselves show that condensation risk has ended. Compare plant or surface temperature with nearby air dew point at the same period and location, then use the existing event sequence. A current trend supports a conditional interpretation, not a universal timing or diagnosis.
AHDB, “Avoiding condensation in glasshouses” — explains plant warm-up lag and local dew-point risk.
UMass Extension, “Reducing Humidity in the Greenhouse” — explains how warming changes RH and how condensation depends on surface temperature.
Use a night diagnosis sequence
1. Define the exact risk window
Separate the sunset transition, stable night period, pre-dawn period, and morning warm-up. A greenhouse that becomes wet shortly after sunset has a different control problem from one that accumulates moisture slowly until dawn.
Ask:
- When does RH begin to rise?
- When does the first local surface approach the dew point?
- What controls changed immediately before that point?
- Did irrigation or another moisture event occur?
- Did the vents, heaters, screens, or circulation fans change state?
2. Check ongoing moisture sources
Review irrigation timing, wet floor area, plant load, standing water, drainage, fogging, and outdoor-air entry. The purpose is to identify what continues adding water after the daytime removal route has reduced or stopped.
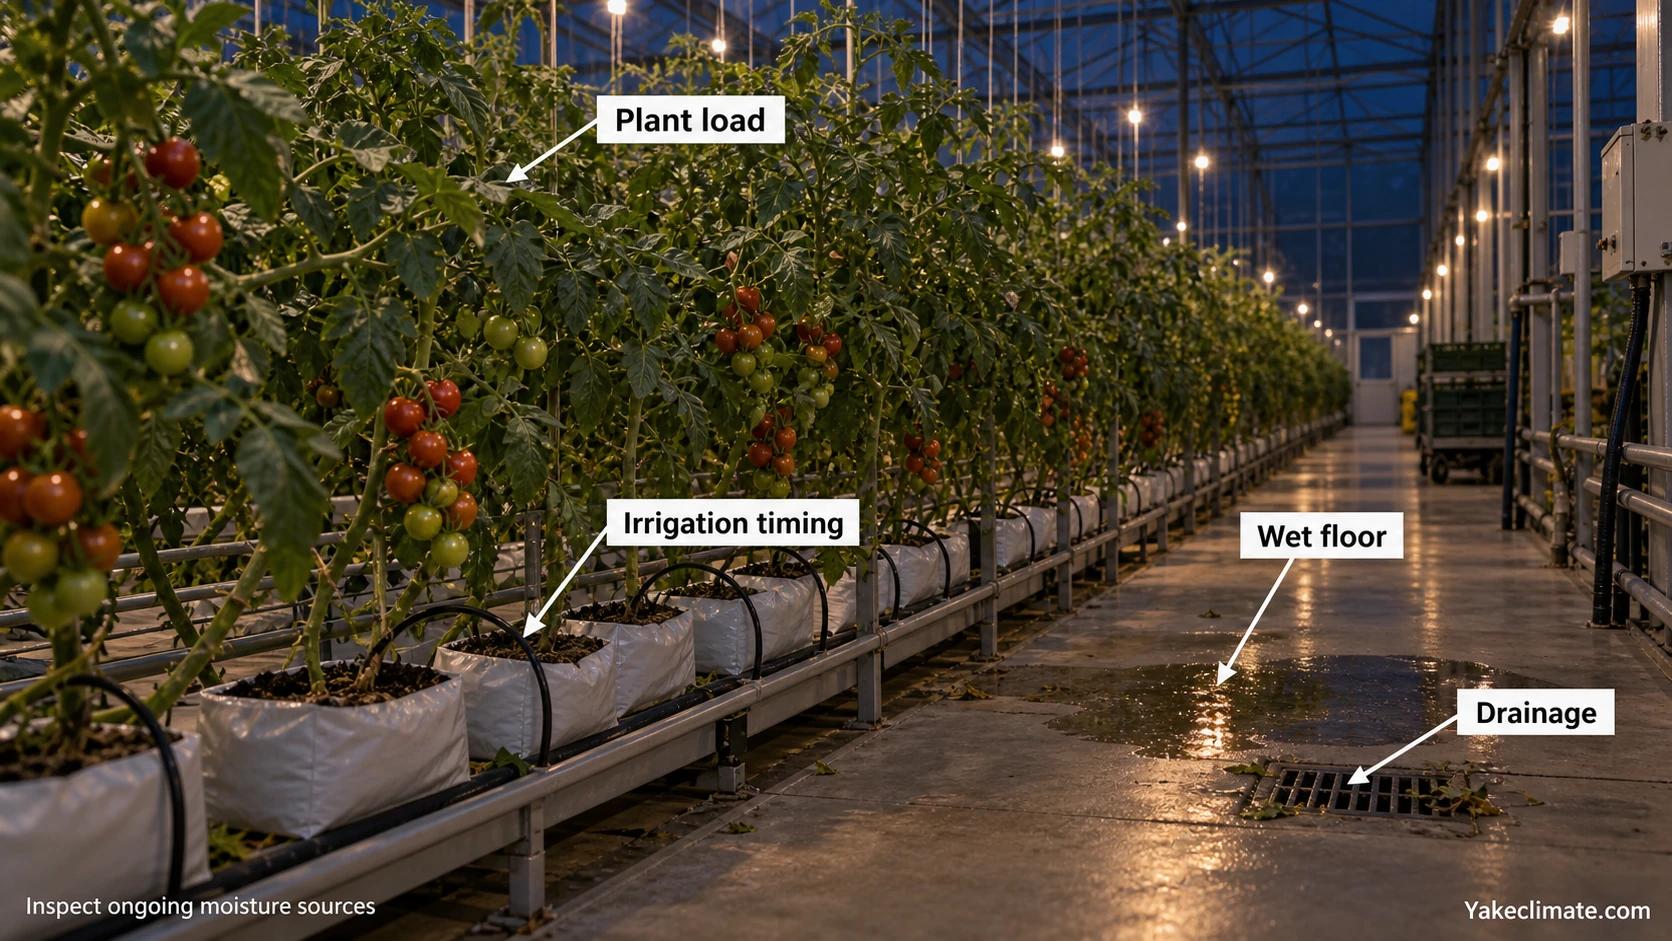
Avoid assuming that all nighttime moisture is crop transpiration. The balance may include several sources, and their importance can change by zone and hour.
3. Check airflow around the risk zone
Circulation fans can reduce local temperature and humidity differences, but only if air reaches the affected zone. Confirm fan state, direction, obstructions, canopy density, and return-air path.
Air movement can help warm air reach a cold surface and make the room condition more uniform. It does not remove water. If the whole greenhouse retains too much vapor, circulation alone cannot correct the moisture balance.
4. Check ventilation against outdoor moisture conditions
Ventilation removes indoor air and replaces it with outdoor air. It is useful for dehumidification only when the incoming air provides a net water-vapor removal route.
The University of Florida IFAS guidance describes winter ventilation as a way to remove warm, moisture-laden greenhouse air, while noting the associated heating demand. This tradeoff becomes central at night: ventilation may reduce moisture but also cool the greenhouse and increase the need for heat.
Do not compare indoor and outdoor RH alone. Compare the moisture state of the two air streams for the risk period, then evaluate whether heat loss, CO2 retention, wind, rain, and control stability permit the required ventilation.
5. Check heating timing and purpose
Heating can raise air and surface temperatures, reduce RH, and keep a critical surface away from the local dew point. It does not remove water vapor by itself.
A late heating response may improve the room sensor while the coldest surface remains at risk. Review when the heat command begins, whether warm air reaches the risk zone, and how ventilation is coordinated. The correct sequence depends on the greenhouse design and operating objective.
6. Identify the remaining moisture duty
After feasible airflow, ventilation, and heating actions are understood, determine whether a material moisture load still remains during the risk window. This is the point at which mechanical dehumidification should be evaluated.
Mechanical dehumidification can remove water while the greenhouse remains substantially closed. It may fit periods when outdoor air is unsuitable, heat or CO2 retention is important, or a more controlled removal route is required. Its actual duty still depends on the moisture load, temperature, airflow path, and required recovery behavior.
Control before the surface becomes wet
A useful night strategy is anticipatory. If control waits for a high room RH alarm after sunset, some local surfaces may already be near their condensation condition.
Build the sequence around the measured event:
- Track the approach to the risk period.
- Maintain air movement through critical zones where appropriate.
- Coordinate heating and ventilation using outdoor moisture conditions and project constraints.
- Start mechanical moisture removal early enough to address the defined load, if it is part of the design.
- Continue monitoring through dawn and the next control transition.
This is not a universal sequence of setpoints. It is a way to ensure that the system reacts to the physical event rather than only to a late room-average symptom.
For the broader method framework, see Greenhouse Humidity Control: How to Diagnose the Load and Choose a Control Route. For a direct method comparison, see Ventilation or Dehumidification for a Greenhouse?.
Data needed for an equipment review
Prepare a night operating package rather than a single target RH:
- greenhouse layout, crop zones, and canopy condition;
- the exact risk periods and event observations;
- time-series indoor temperature, humidity, and calculated dew point at representative locations;
- temperatures of the suspected cold surfaces;
- outdoor temperature and humidity for the same periods;
- irrigation, door, screen, vent, heater, and circulation schedules;
- current equipment operating states and airflow paths;
- the project-defined environmental objective and recovery requirement;
- installation, power, drainage, regeneration-energy, controls, and maintenance constraints.
These inputs allow an equipment manufacturer to evaluate a defined duty. The greenhouse system designer remains responsible for the overall climate strategy, sensor plan, integration, and project result.
FAQ
Frequently asked questions
Why does greenhouse RH rise after sunset if irrigation has stopped?
Air cooling raises RH, moisture can remain on plants and surfaces, and crop transpiration may continue under some conditions. Reduced ventilation or a change in control state can also reduce removal.
Can fans prevent condensation?
Fans can reduce local stagnation and improve temperature and humidity uniformity. They cannot remove water vapor. Condensation risk can remain if a surface is too cold or the total moisture load is not removed.
Why can the main sensor look acceptable while leaves or frames are wet?
The main sensor may be warmer, farther from the cold surface, or outside the stagnant zone. Condensation depends on the nearby air and surface condition at that location.
When should mechanical dehumidification be considered?
When a defined night moisture duty remains during periods in which ventilation is unavailable, unstable, or operationally constrained, and when equipment can be integrated with an effective airflow and control path.
Diagnose the event before changing the setpoint
Night humidity is a sequence of moisture input, cooling, local surface conditions, airflow, and control response. Find the first risk surface, measure the local condition, and identify the remaining removal duty before selecting equipment.
Yakeclimate designs and manufactures industrial dehumidification equipment for complex climate applications. To review a night-duty requirement, share the event data and operating conditions.


